Chat Logs in Thinkstack
info
This guide provides an overview of chat logs in Thinkstack, explaining how to access, filter, download, and organize user conversations.
Once you've trained and deployed your chatbot on your website or integrated platforms, your users will begin interacting with it. Reviewing these conversations helps you deeply understand user behavior and refine your chatbot’s responses effectively.
Viewing the chat logs in Thinkstack#
To access chat logs, select your chatbot from the dashboard, and navigate to the Chats section.
Here, you'll see a list of all conversations. Each listed conversation represents a unique interaction between your chatbot and a visitor. To review a conversation in detail, click on the desired chat instance.
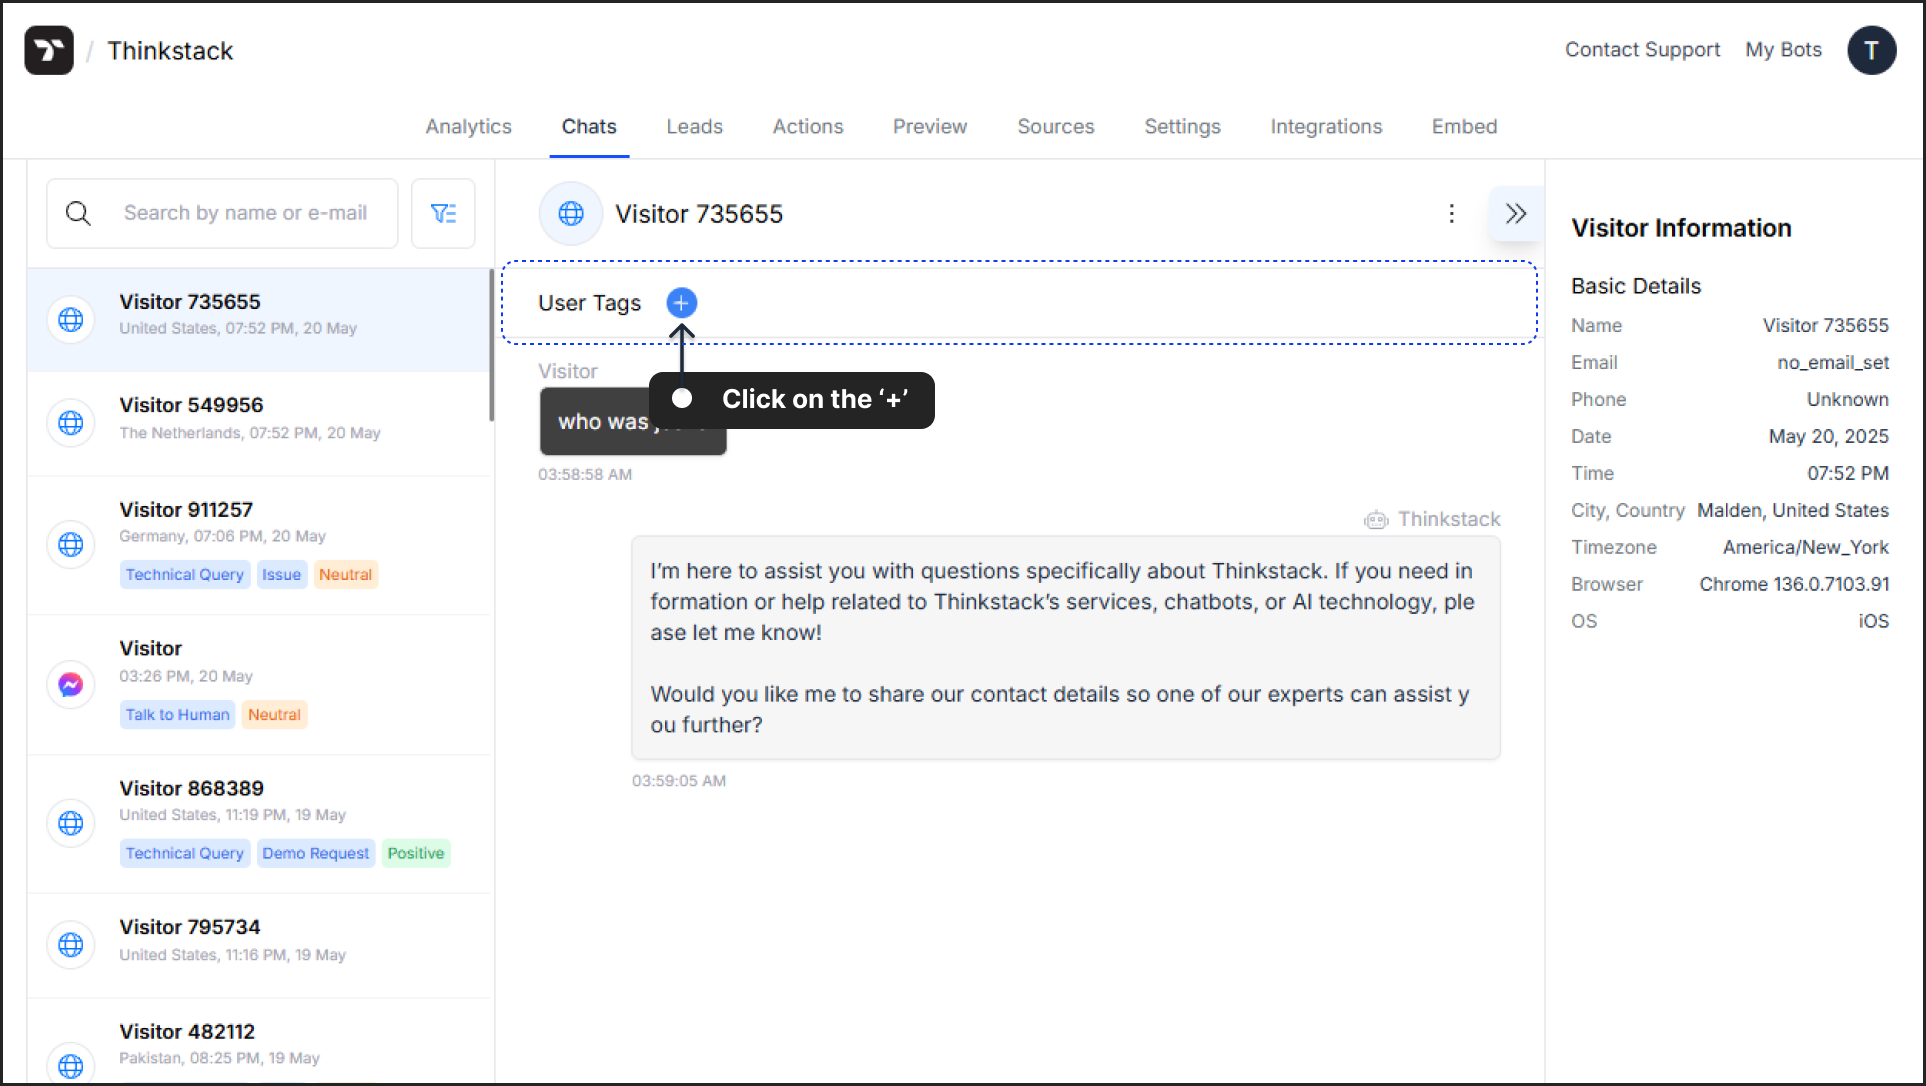
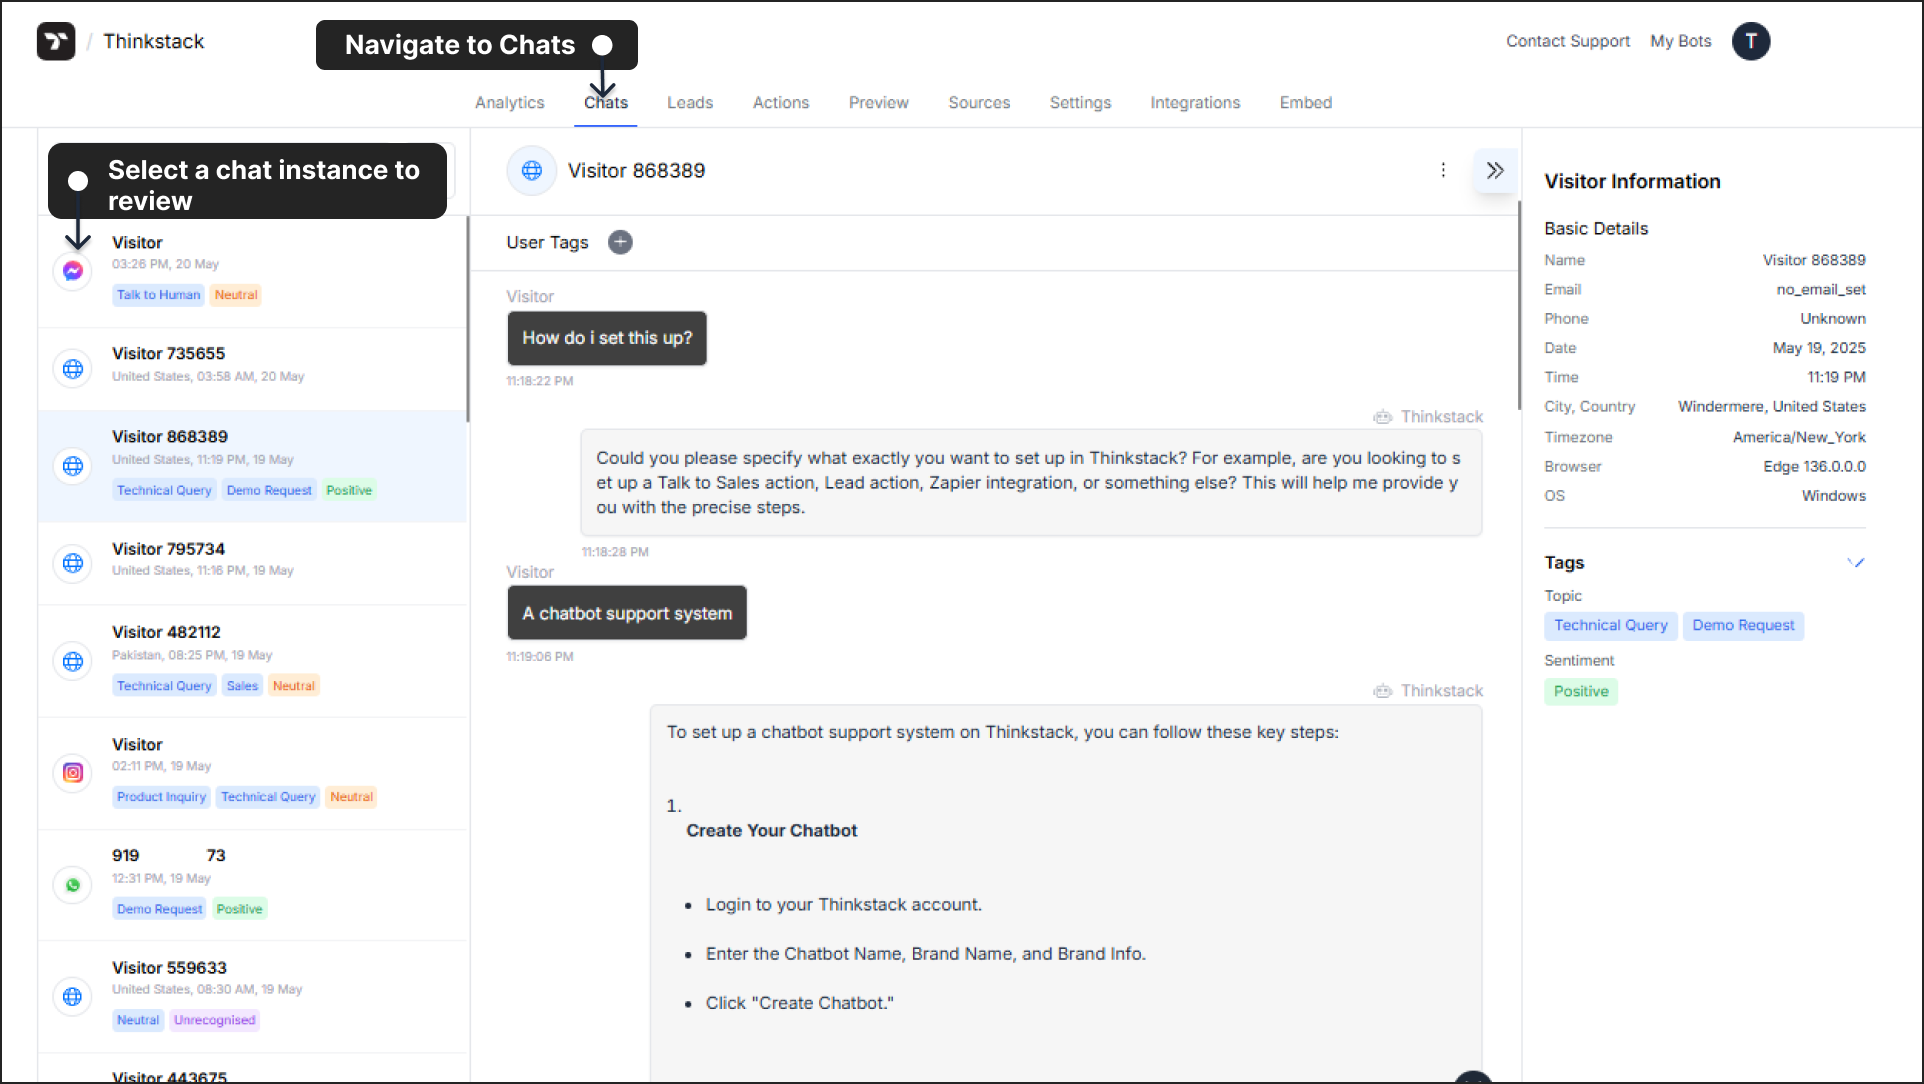 On the left-hand side, you'll see detailed information about the visitor, including their name, email, phone number, date and time of interaction, city, country, timezone, browser, and operating system.
note
By default, visitors are identified by a visitor ID (e.g., Visitor 940887). However, if your chatbot uses a lead form and a visitor submits their details, their name and email address will replace the anonymous visitor ID.
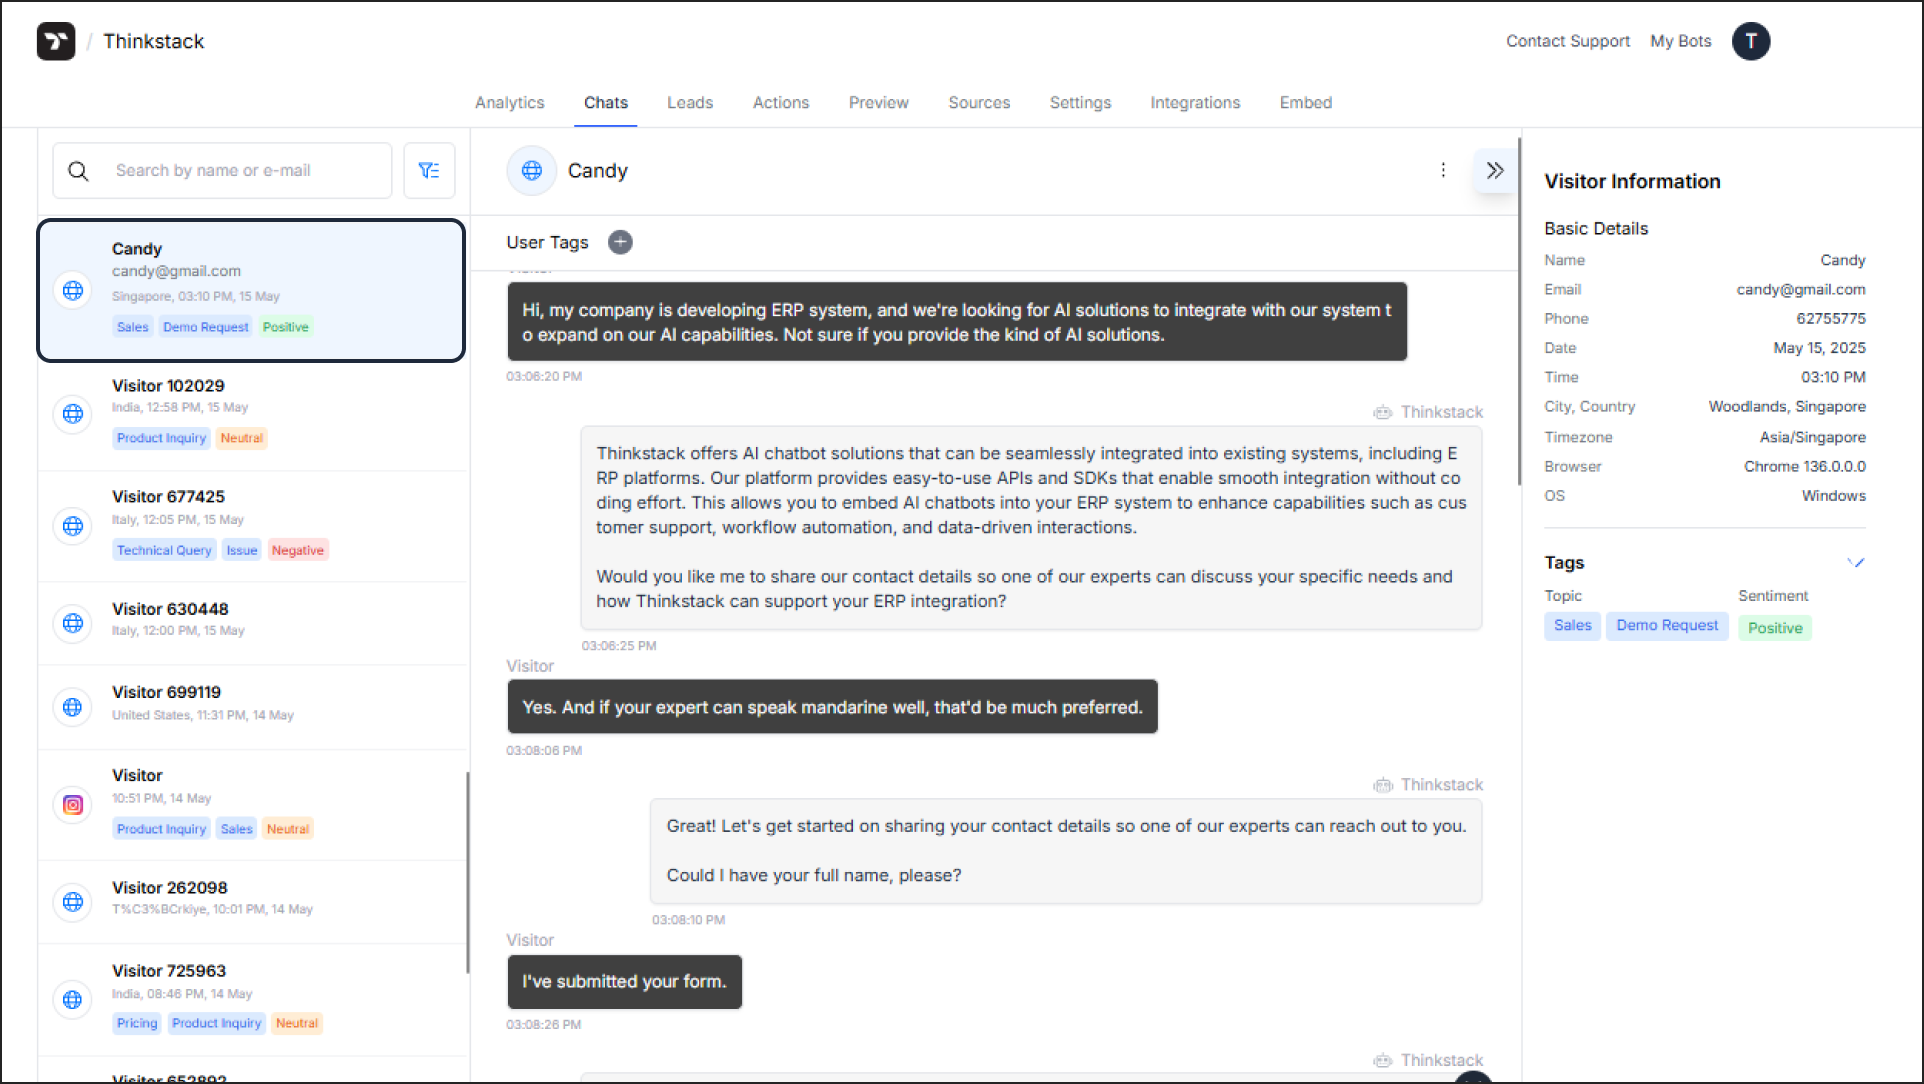 You can search for conversations using visitor names or emails by typing them into the search bar.
On the right side of the conversation window, you will also see tags such as the topic and sentiment of interaction that you have set. These tags are intelligently applied to each chat instance by your chatbot and help categorize interactions quickly.

Chat logs Filter#
You can access the desired chat instance from the Chat logs with the help of filters.
To filter out the chat, click on the filter option available in the search bar. You have the option to choose the time frame, such as Today, Last Week, Last 30 Days, or a Custom Date Range.

You can also filter the Chat logs based on the source, such as accessing chats from your website or integrated applications like Facebook Messenger, WhatsApp, Instagram, or Slack. You can also filter the chatlogs based on the human handoff status(handoff completed and handoff pending) too.

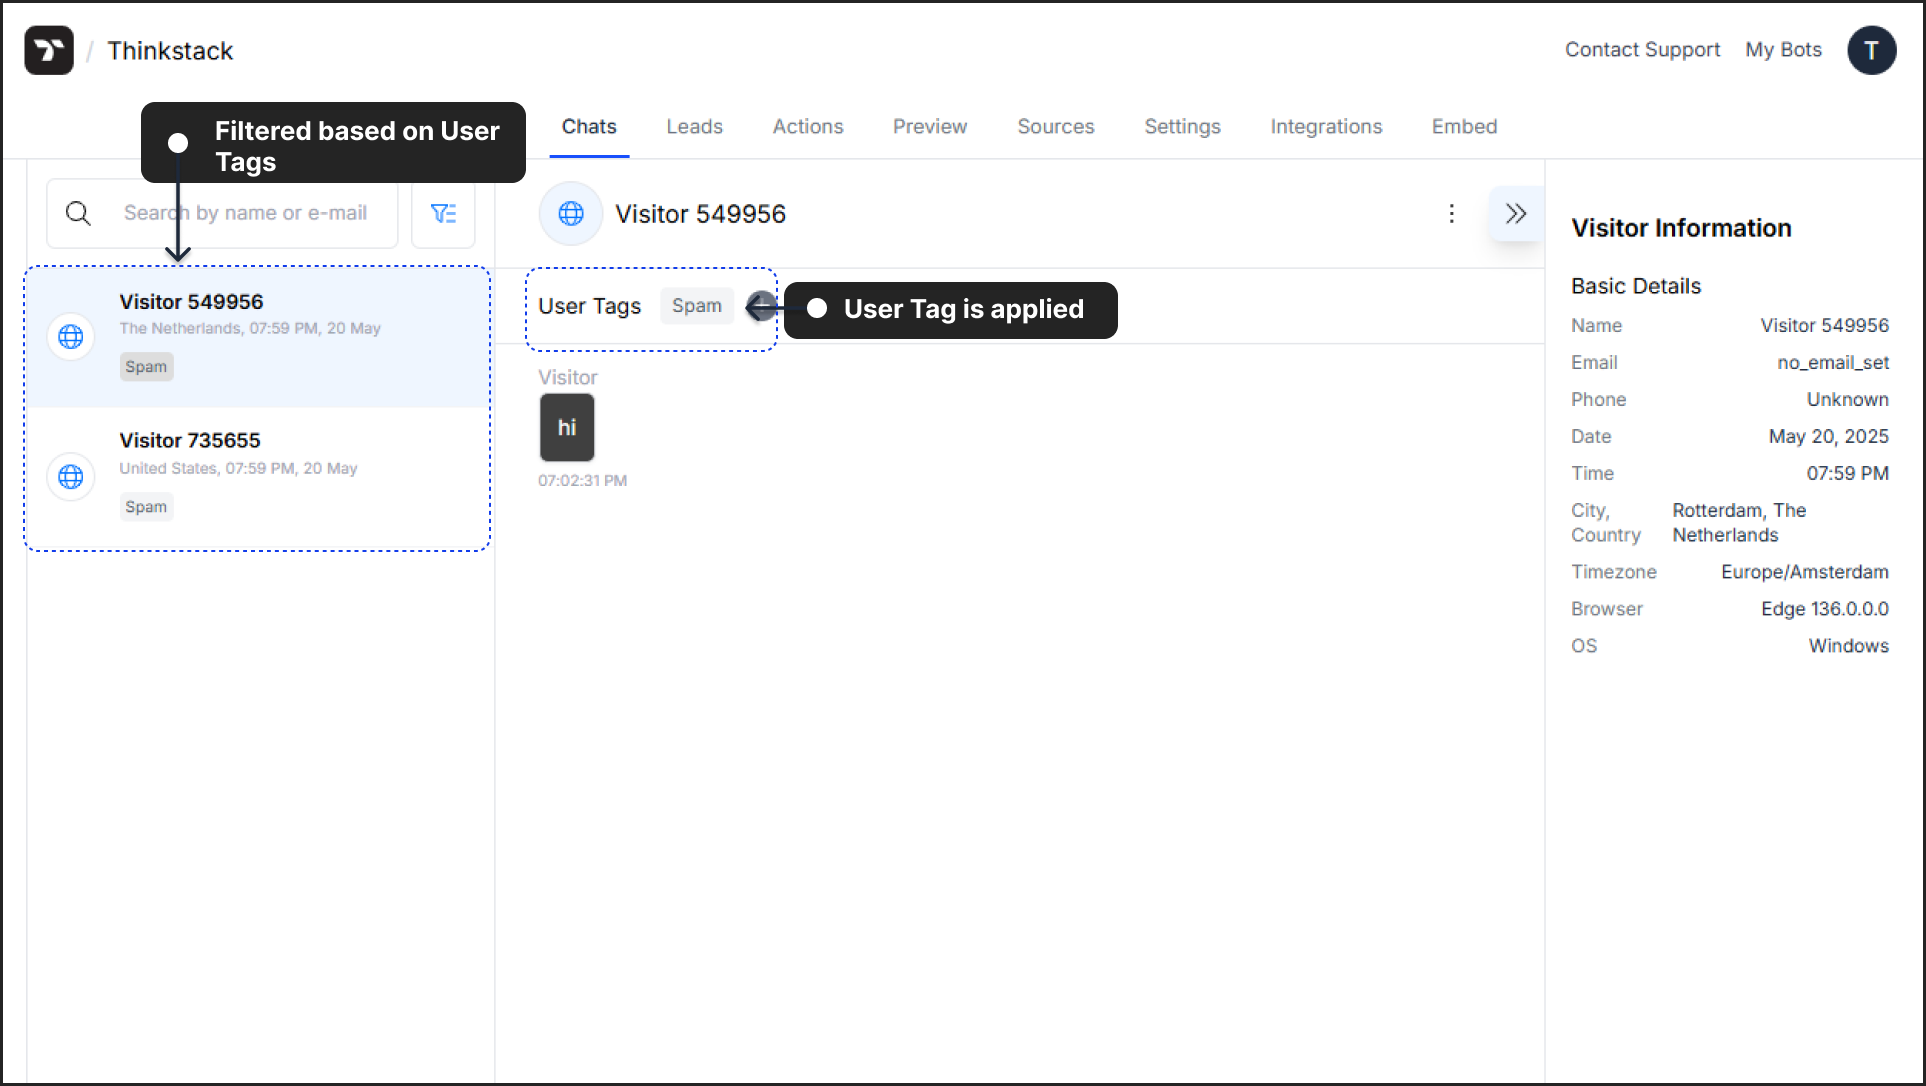
And, you can filter chats based on tags by selecting the desired topic, sentiment, or user tags of your interest.
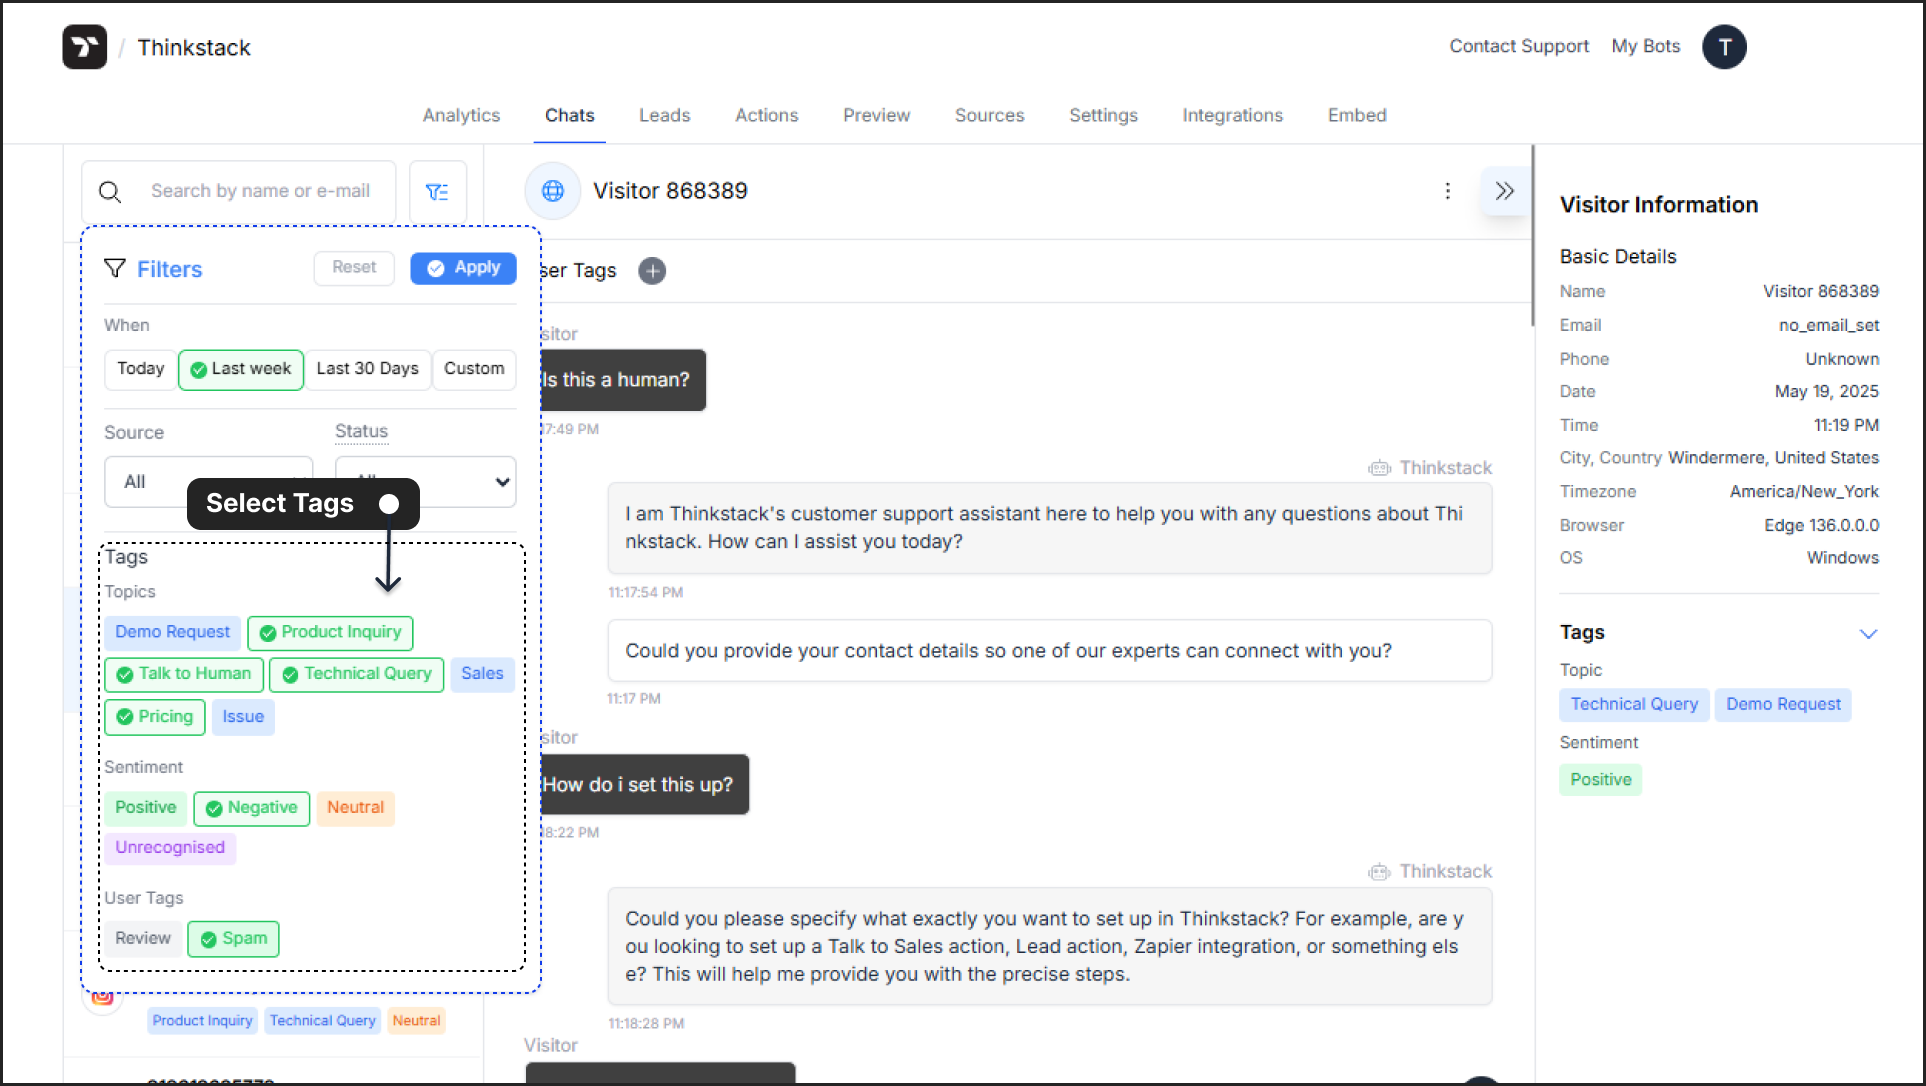
When the chatlog volume is large, you can rely on a combination of these filters to quickly access the desired chat instance.
Download Chat logs#
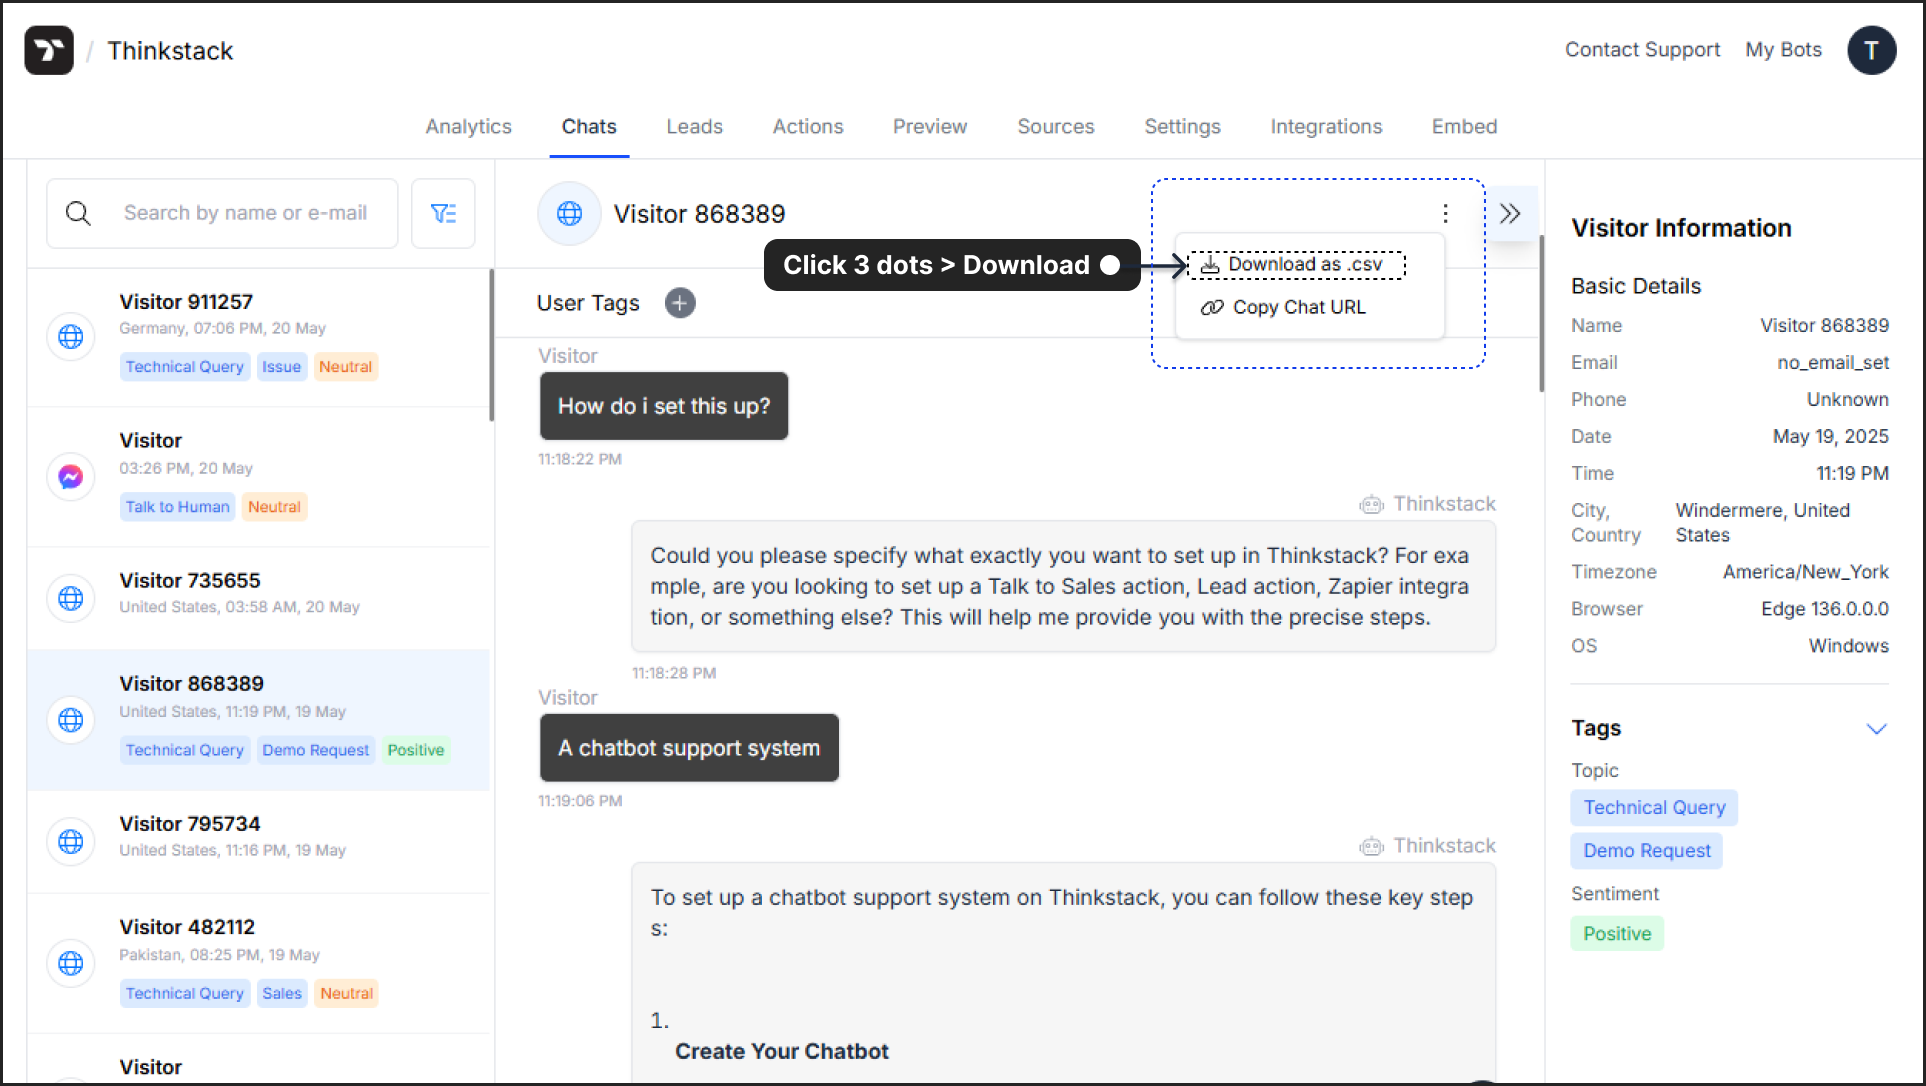
If you want to keep a copy of a chat instance for reviewing or sharing with your team, you can download the chat interaction of a desired visitor.
To download, click on the desired chat instance of the visitor. Click on the three-dot icon and then select the Download option. The selected chatlog/chat instance will be downloaded as a .csv file.
Organising the Chats#
You can organise chat instances further by making use of User Tags.
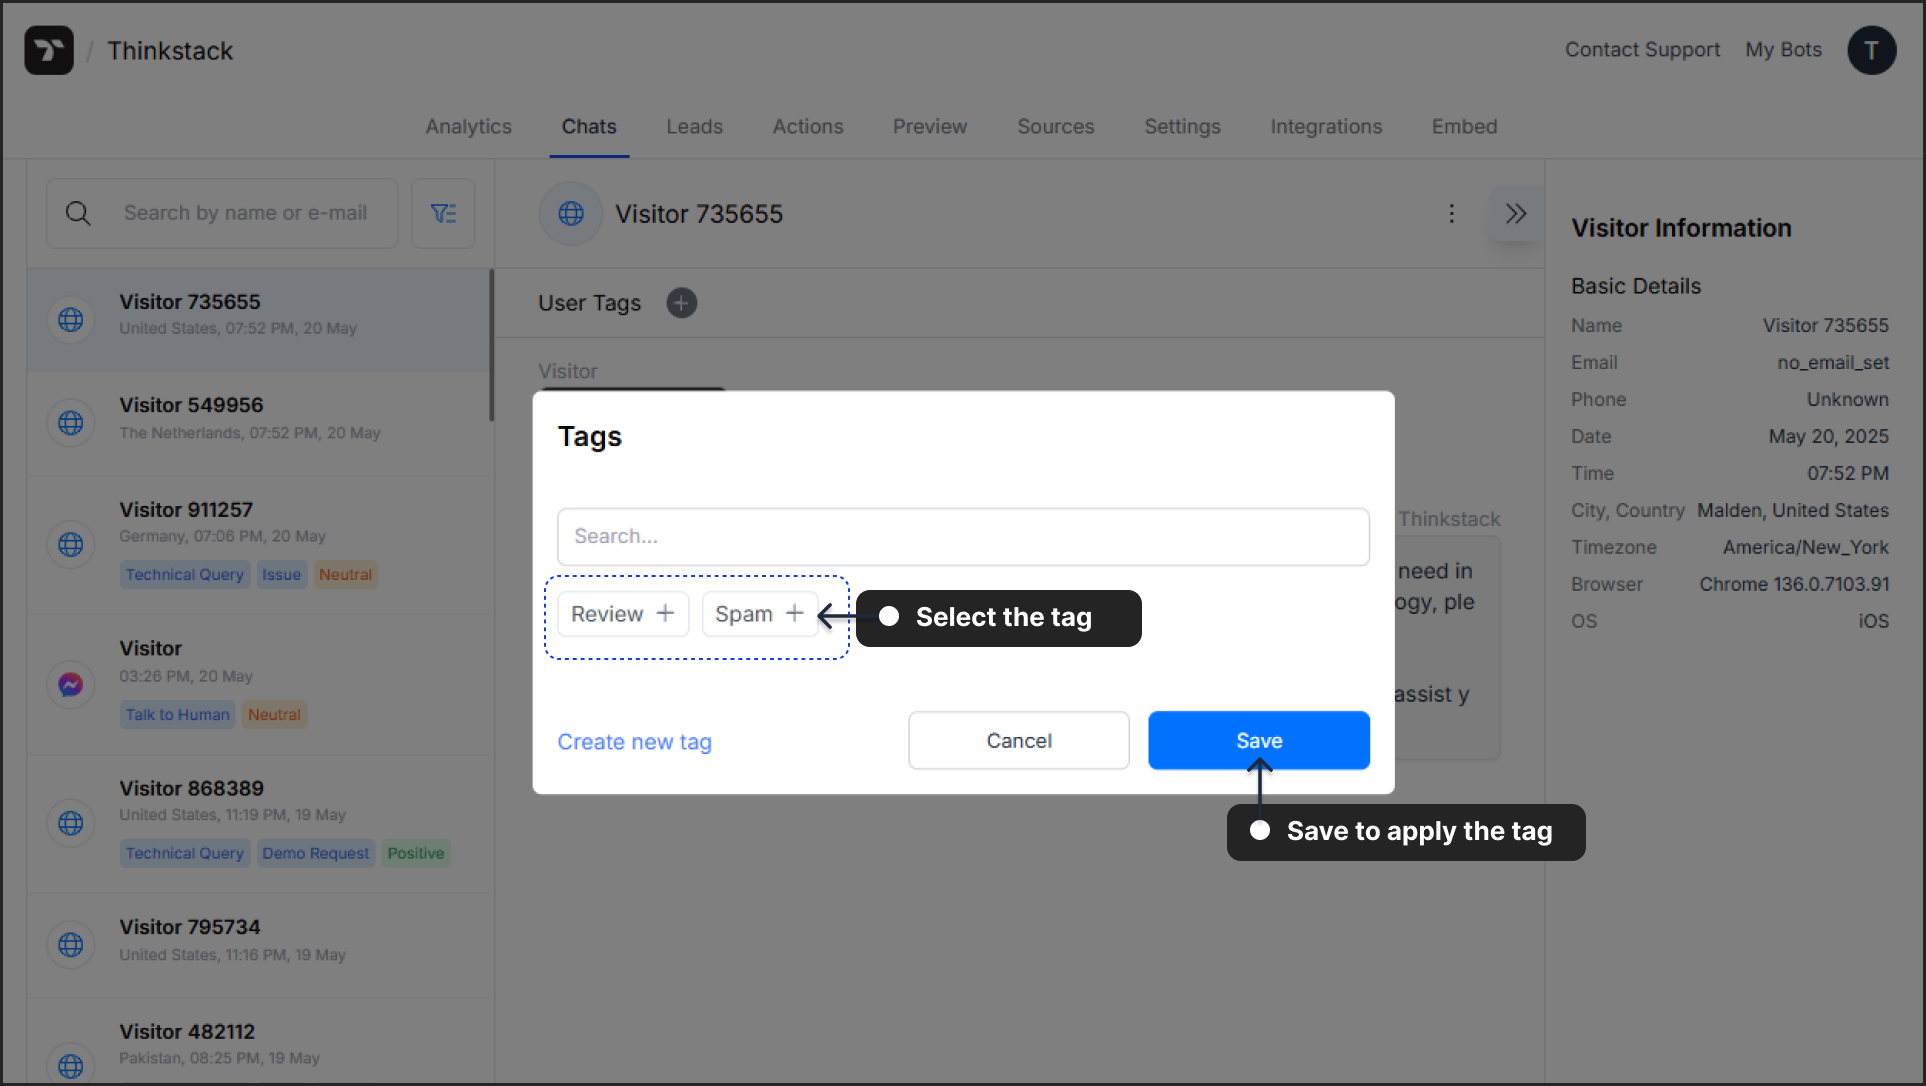
To do this, first, you should create user tags from the Tags settings.
Once you have created user tags, go to the desired chat instance and click on the + icon. You will now see a list of tags you have created. Simply select the desired user tag and click on Save.
Now, that particular chat instance is labelled with the user tag you just applied. You can apply user tags to chat instances of your choice and then quickly access them using filters by selecting the user tags from the filter options.
That's a wrap 🎉. You are now all set to access, analyse, filter, download, and review the chat interactions of your users. To further dive deep into the data, check out Chatbot Analytics.