SMTP Integration via SendGrid
Once your custom domain is mapped to Thinkstack, you can configure SMTP integration to ensure all system emails are sent from your own domain/mail ID via SendGrid. This allows you to communicate with your end users using your branded email for important notifications.
Prerequisites
Before setting up SMTP integration, ensure you have:
Access to the Thinkstack Partner PortalSuccessfully mapped your custom domain to Thinkstack
Active SendGrid account with permissions to create API keys and dynamic templates
Key emails you can control through this integration include:
- Welcome Email for New Users: Greet new users with a welcome message when they log in for the first time, sharing login details and resources about your platform.
- Crawling Completion Notification: Notify users when a website data source they've added has been successfully crawled. This lets them know they can proceed to train their chatbot.
- Password Reset Email: Send users a temporary password or reset link after their first sign-up or whenever they request a password reset.
- Account Deletion Verification: Provide users with a verification code to confirm their identity before deleting an account.
note
By integrating SendGrid SMTP, these emails will come from your custom email address
(improving deliverability and branding) instead of a default Thinkstack address.Follow the steps below to set up the integration.
1. Navigate to SMTP Settings#
Log in to your Thinkstack Partner Portal and go to your White-Label settings (where you configured the custom domain). Scroll down to the SMTP Integration (SendGrid) section.
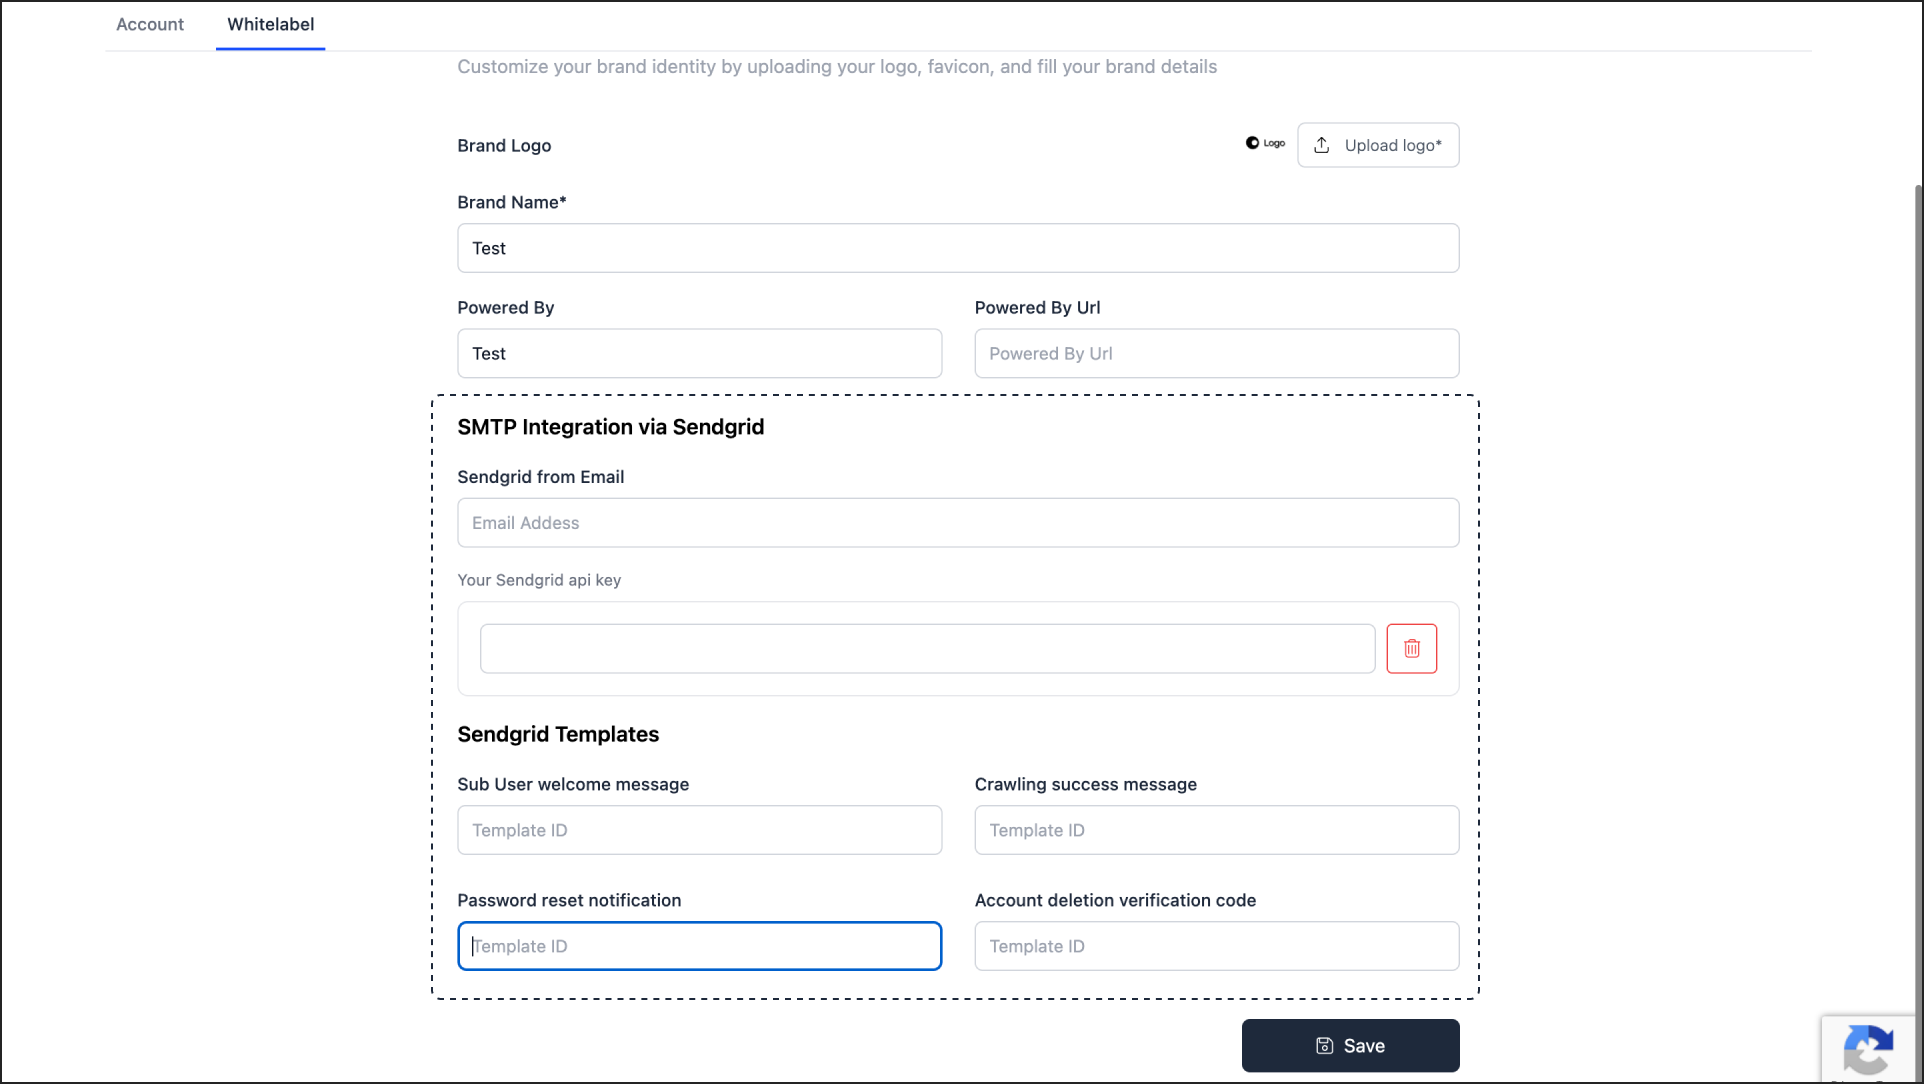
2. Configure SendGrid Integration#
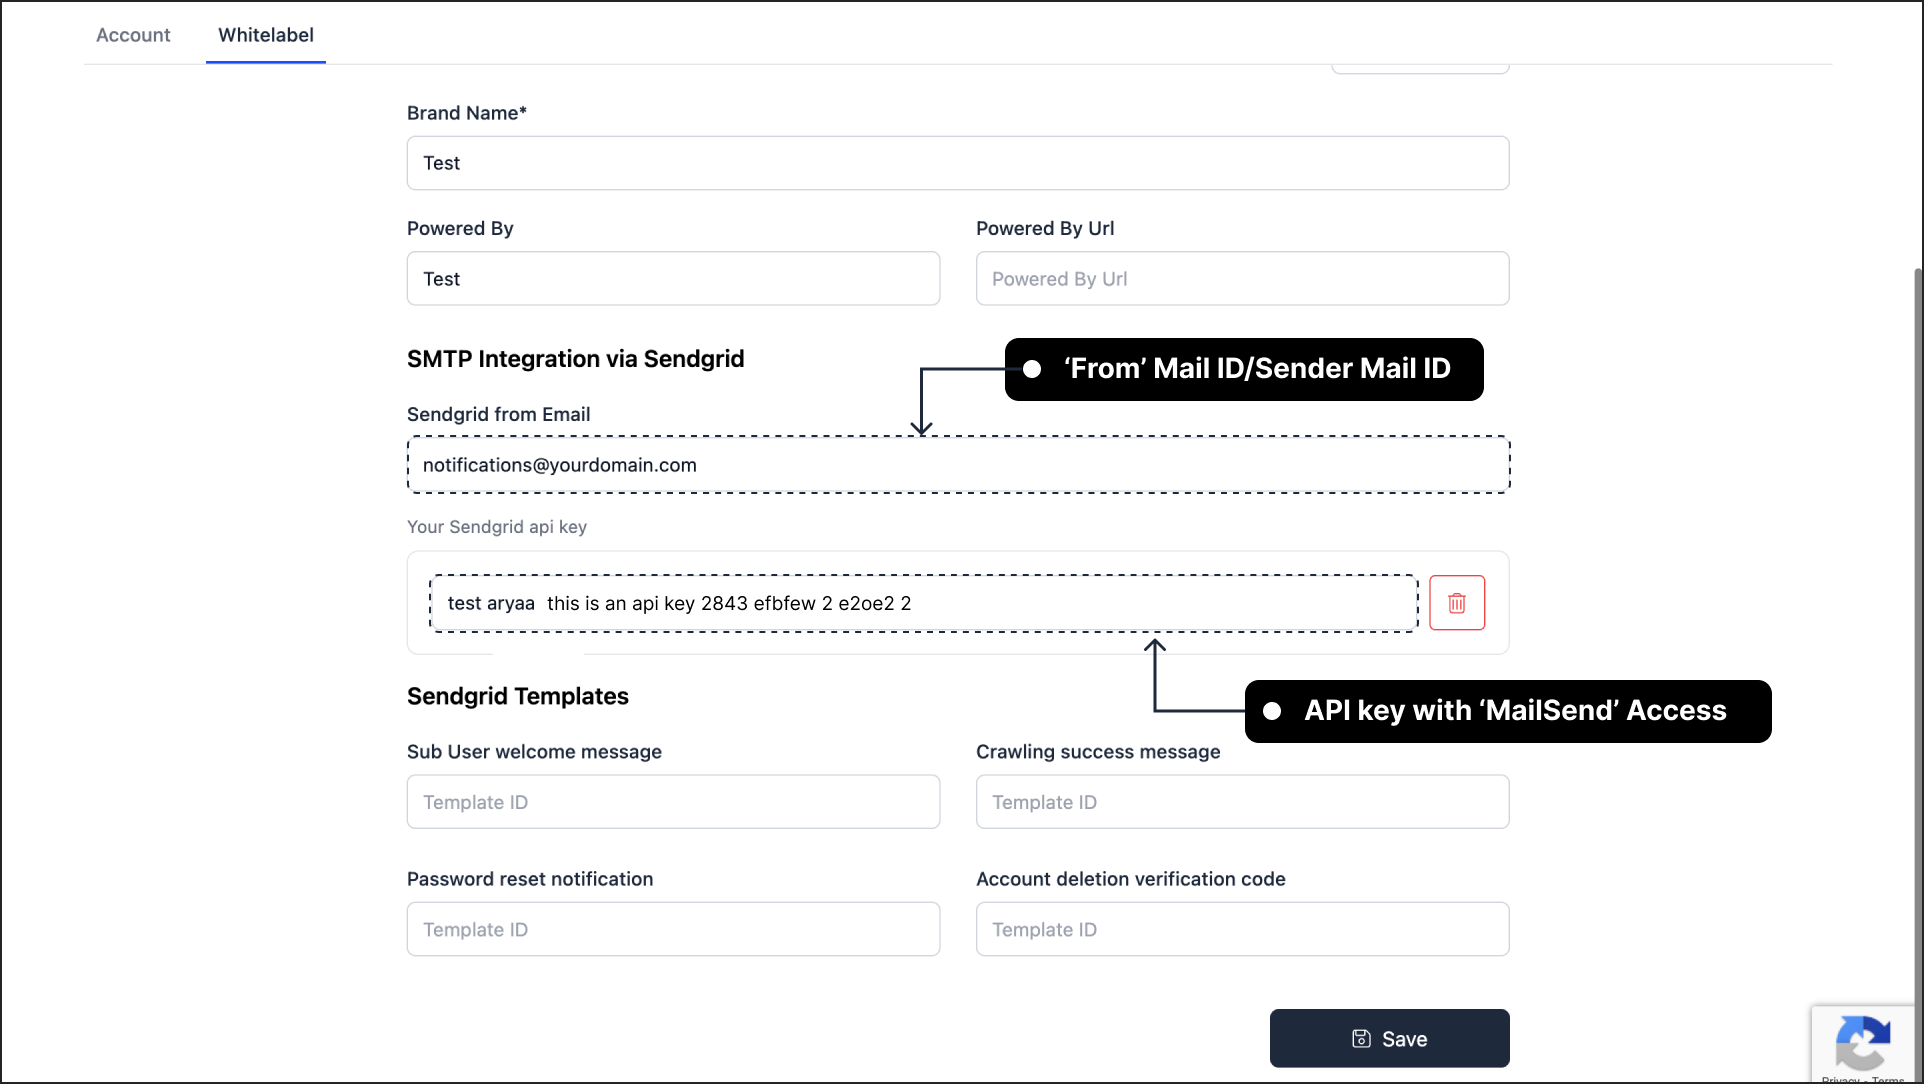
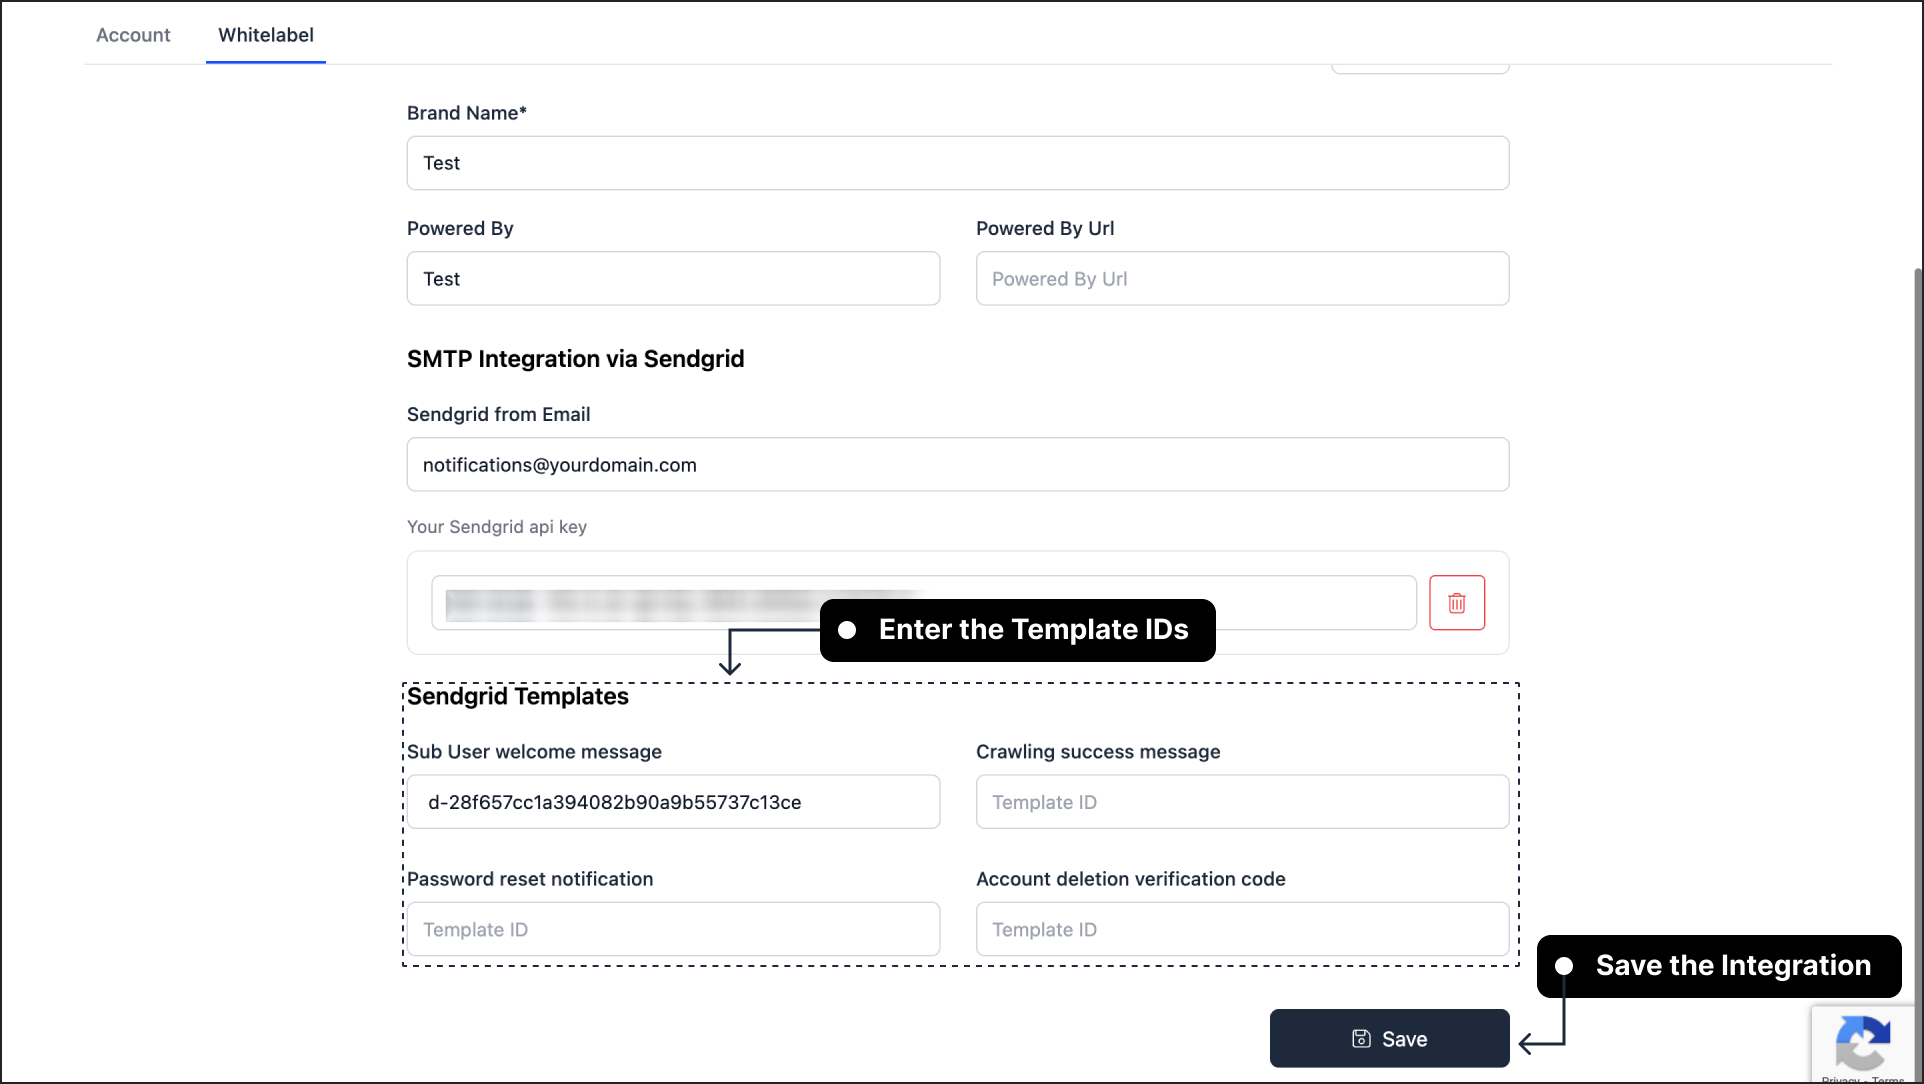
In the SMTP Integration section, enter your SendGrid sender details:
SendGrid From Email: Enter the sender email address that will appear in the "From" field of outgoing emails (e.g.,
notifications@yourdomain.com). This email must be a verified sender in your SendGrid account.SendGrid API Key: Paste a SendGrid API Key with permission to send emails. It's recommended to create a dedicated API key for Thinkstack (with at least Mail Send permission).
Need Help Setting Up SendGrid?
To send emails from your domain, you need to verify a sender identity in SendGrid and create an API key.
1. Verify Sender: Follow Twilio SendGrid's guide on
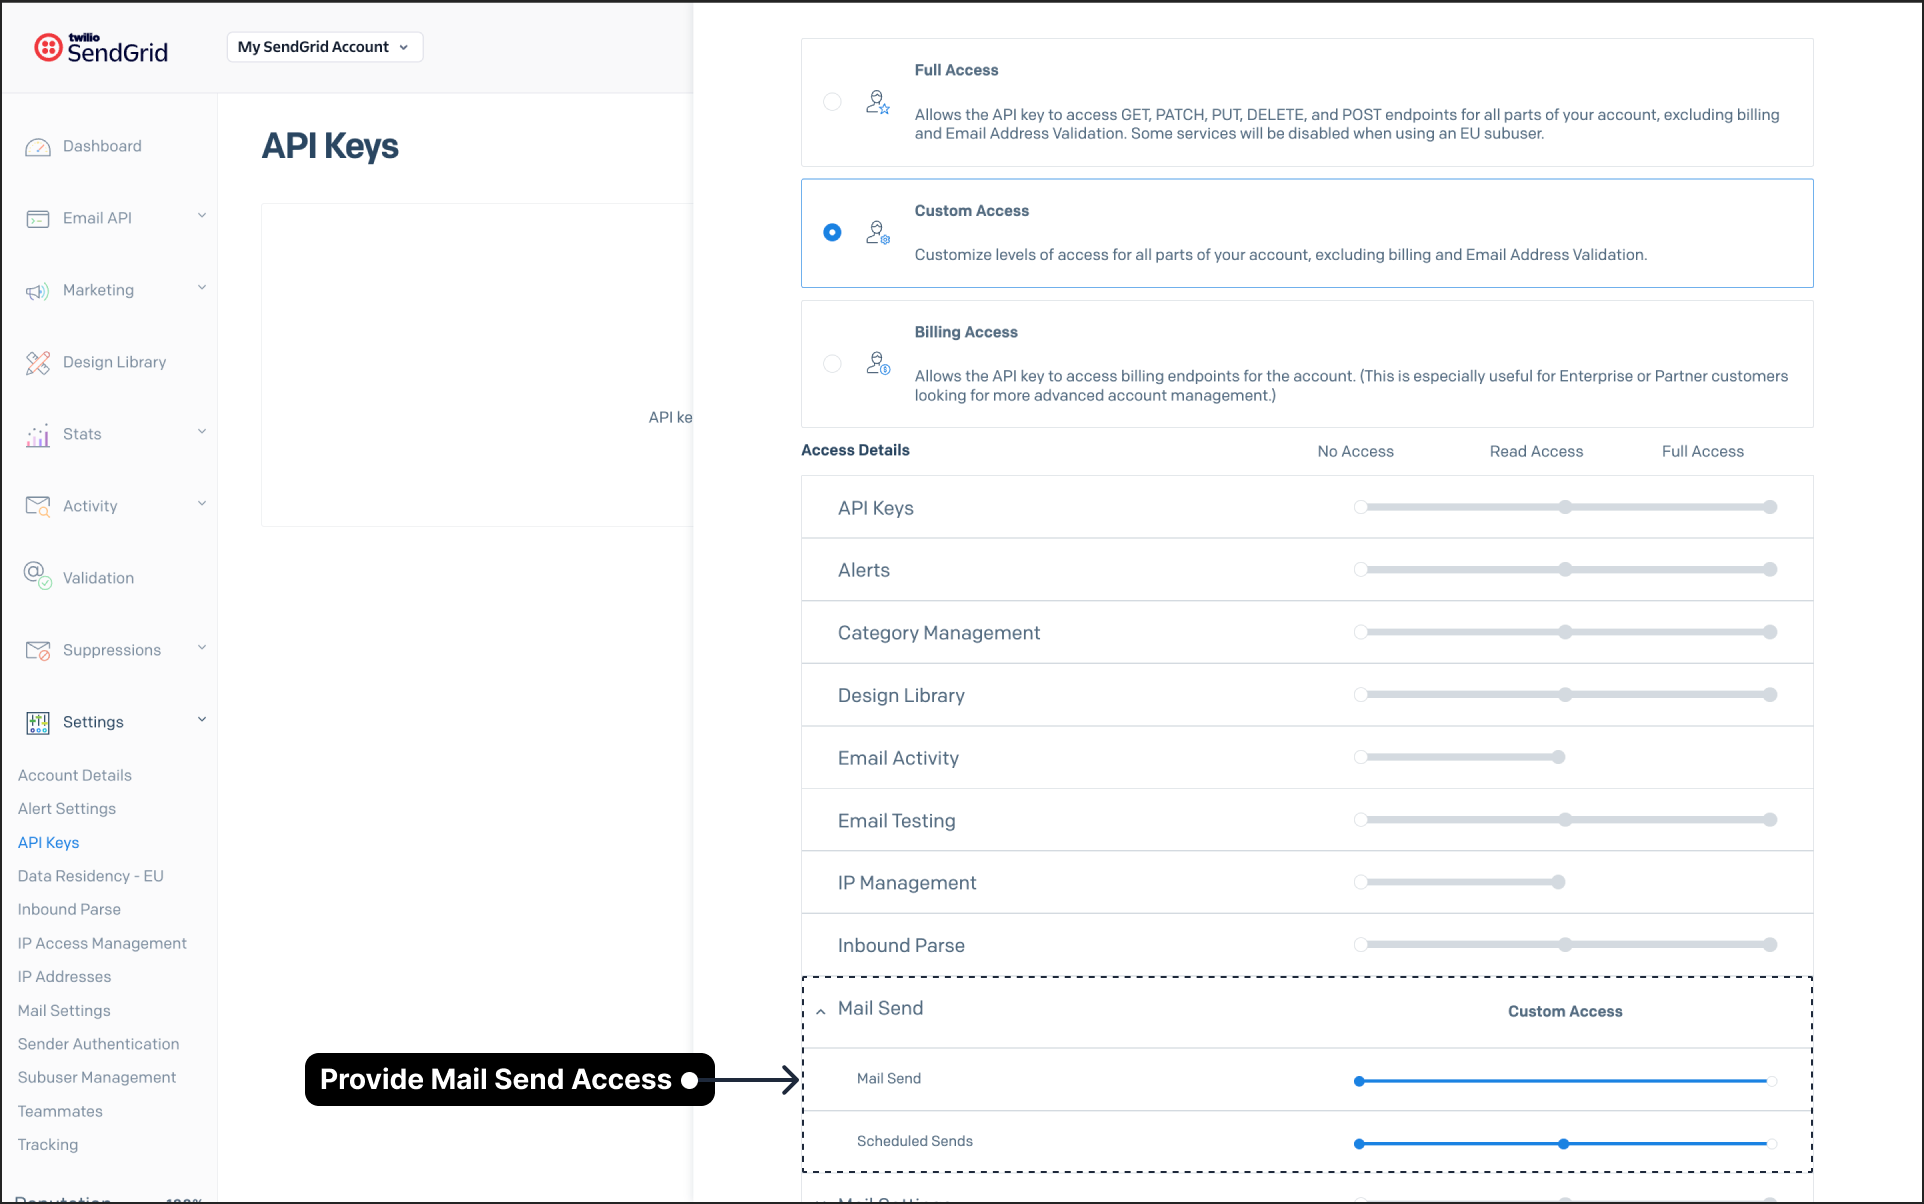
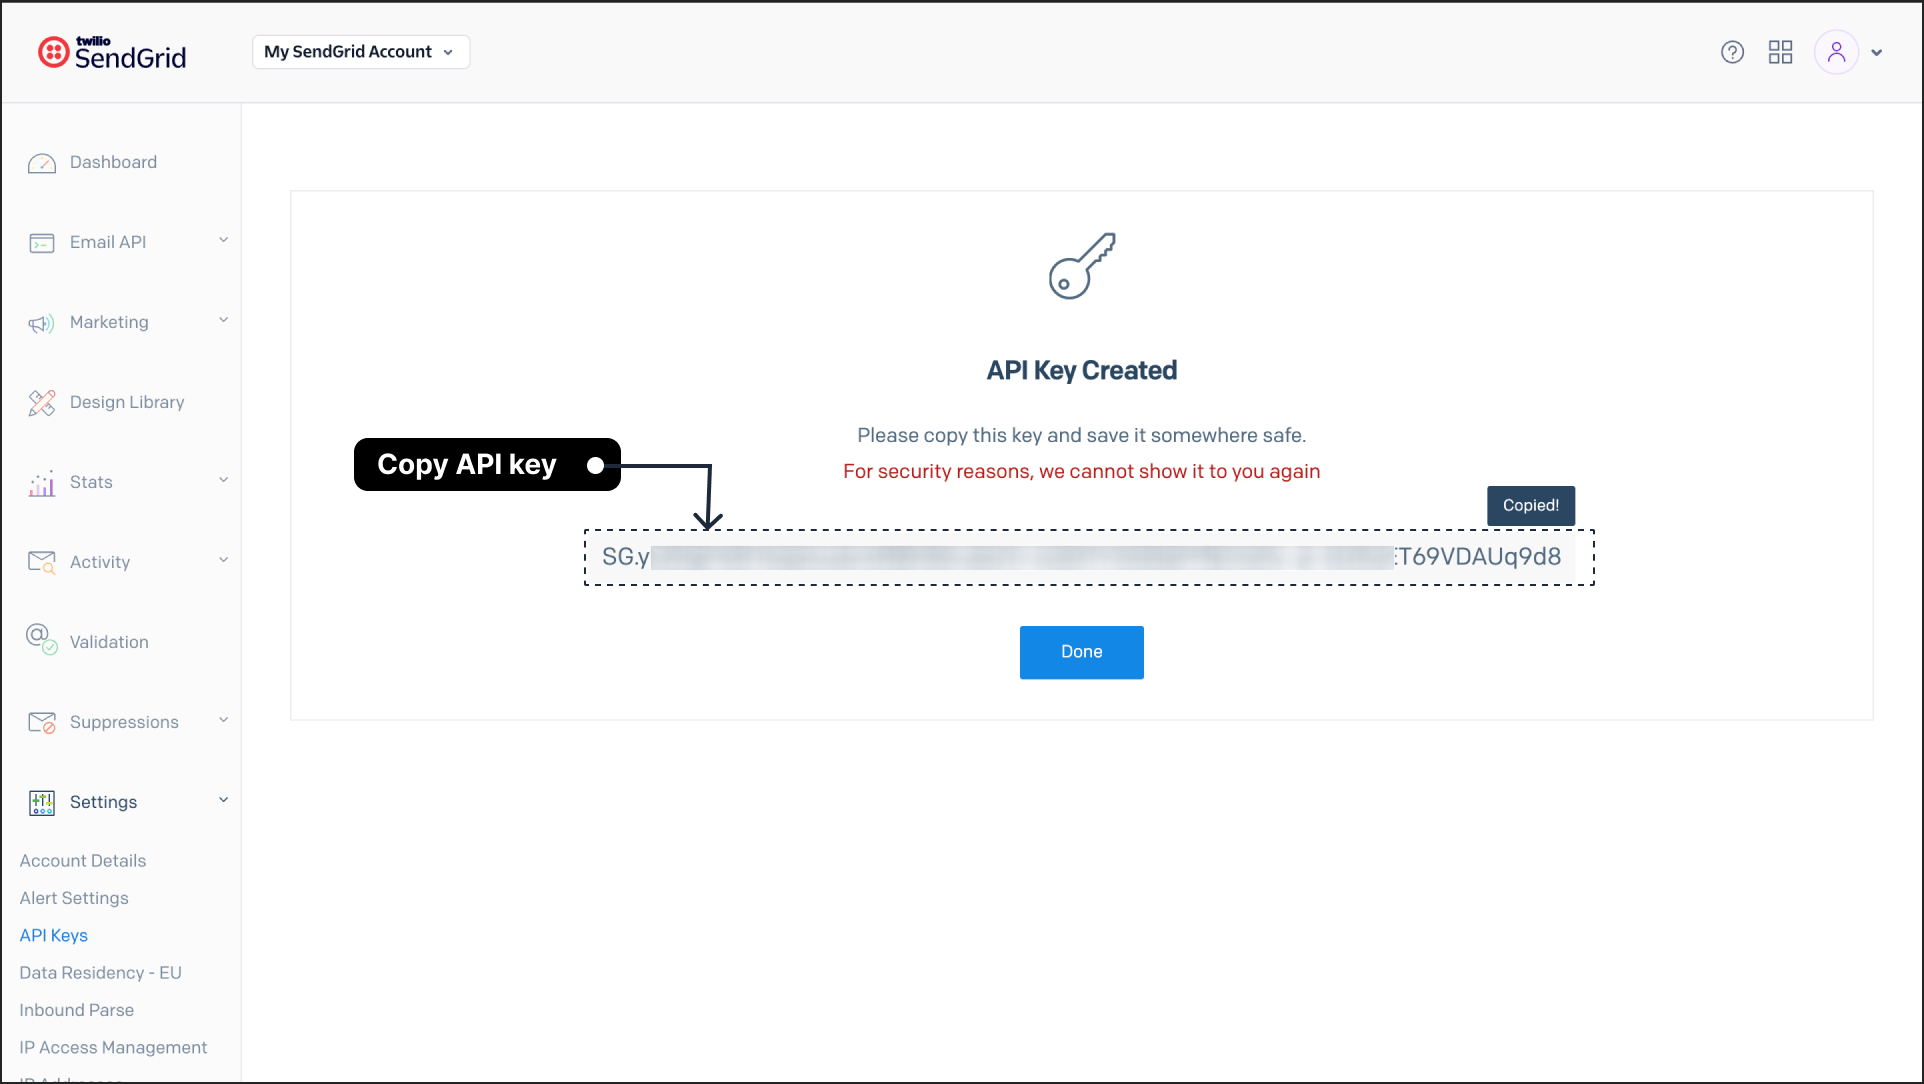
: verifying a sender email address to authenticate your email or domain.2. Create API Key: Navigate to Settings > API Keys in your SendGrid dashboard and click Create API Key. Give it a name (e.g., "Thinkstack SMTP") and select Restricted Access with the Mail Send permission.Click on Create & View. Now, copy the key and paste it into the Thinkstack Partner Portal.
: View API Key Guide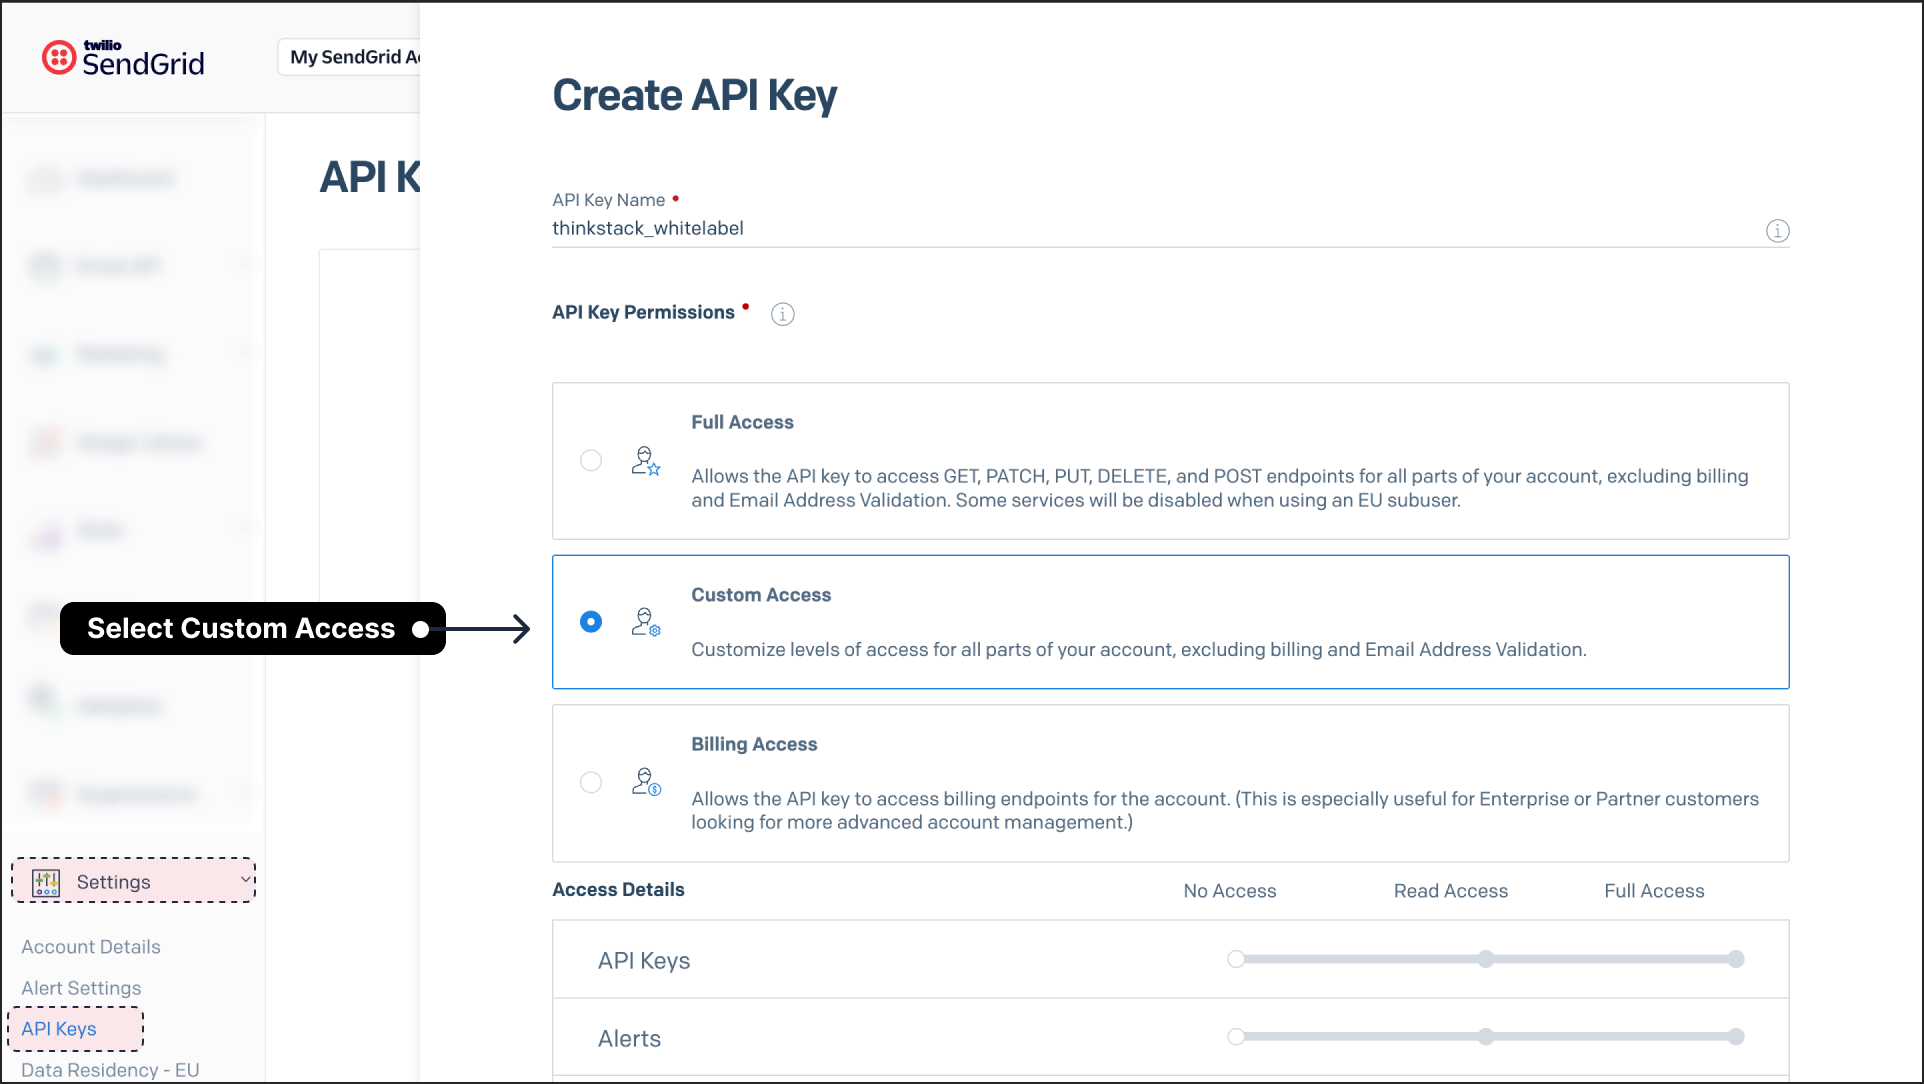
3. Create and Map Template IDs#
Thinkstack uses SendGrid Dynamic Templates for system emails. You need to create four dynamic templates in SendGrid and map their Template IDs in the Partner Portal.
How to Create Dynamic Templates in SendGrid
We recommend you to
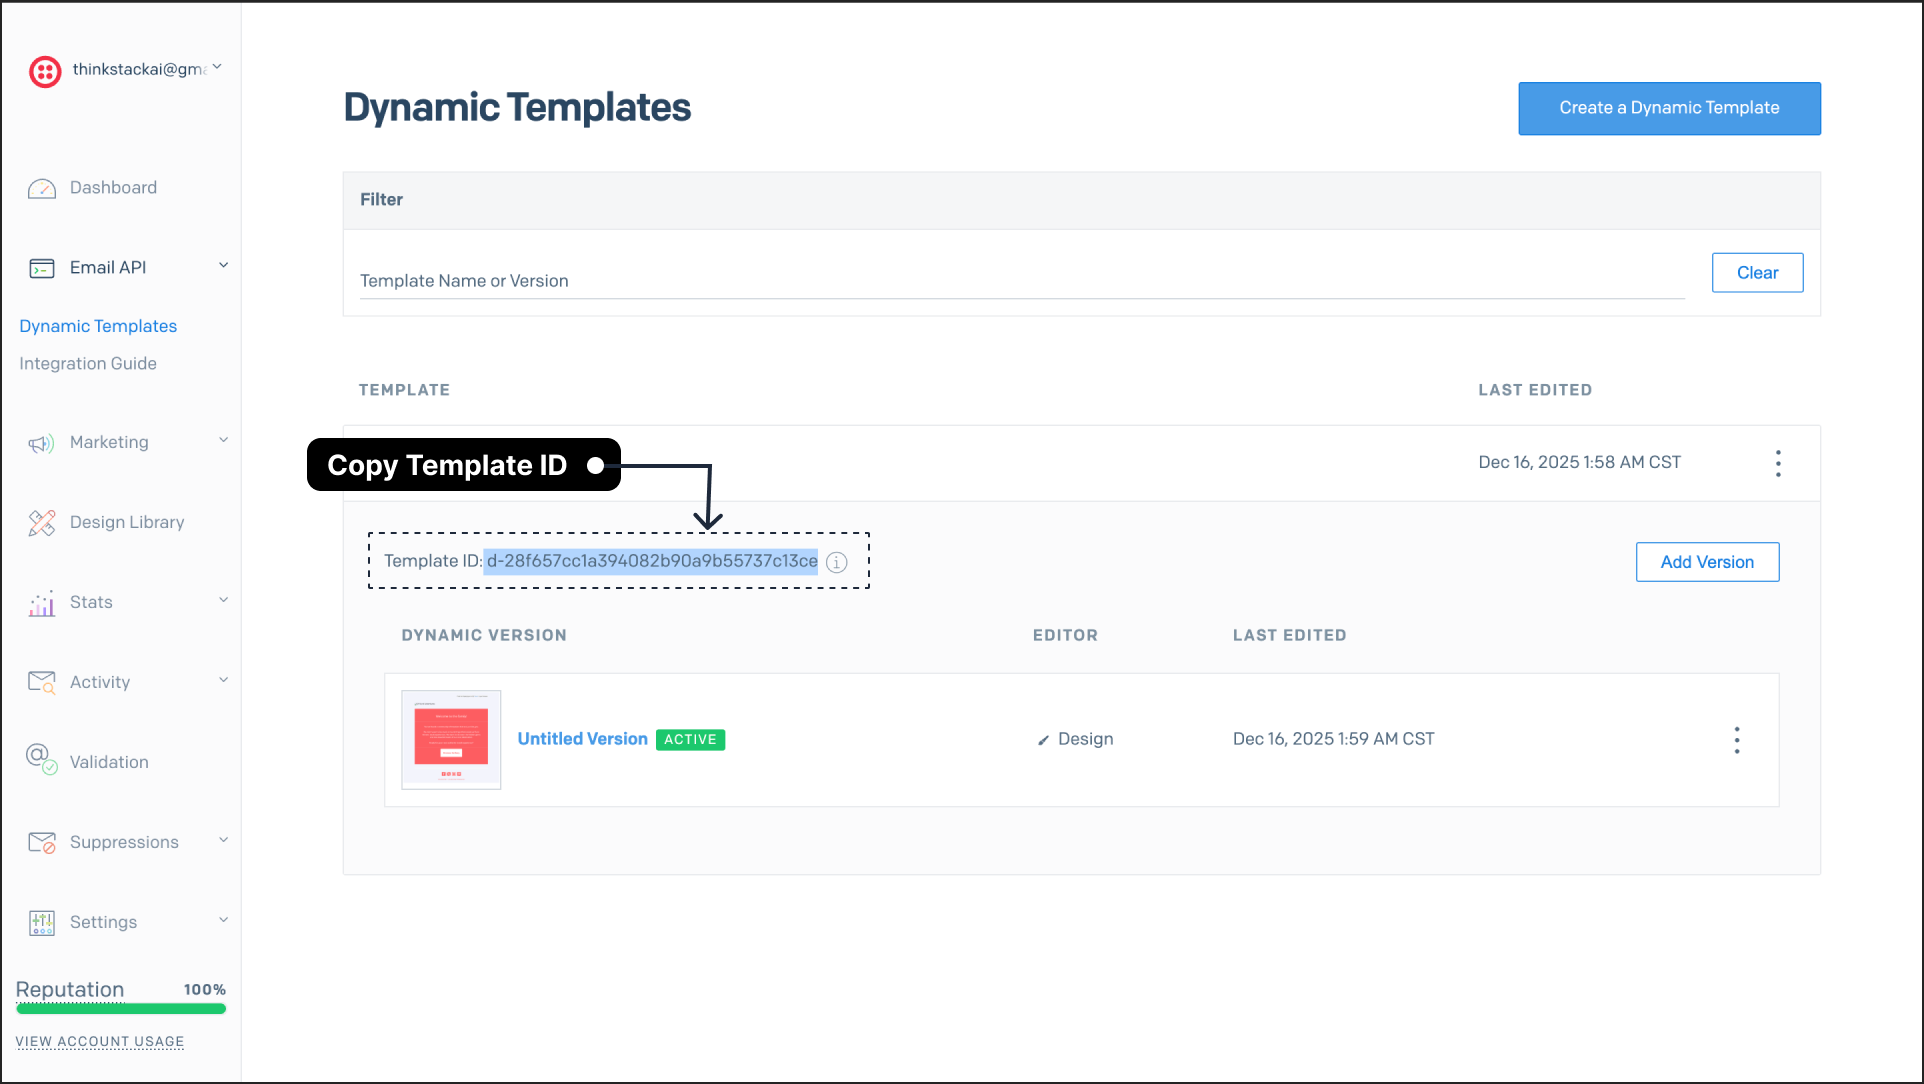
: Read SendGrid Documentation for detailed instructions.- In SendGrid, go to Email API > Dynamic Templates
- Click Create a Dynamic Template
- Give the template a name (e.g., "Thinkstack Welcome Email")
- Add a new version where you can design the email
- Insert the placeholder variables listed below in your email design
- Once saved, copy the Template ID from the Dynamic Templates list
We recommend you to create the following four templates in SendGrid. Each template uses specific dynamic variables that Thinkstack will populate when sending emails.
A. Sub-User Welcome Message#
Purpose: Welcomes new users to the platform when they're invited by an admin.
Required Variables:
Example Email Content:
Hello,
Welcome to {{orgName}}! {{addedBy}} has invited you to join the platform.
You can access your account using the following credentials:
Email: {{email}}
Temporary Password: {{password}}For security purposes, we recommend changing your password after your first login. If you have any questions or need assistance, please don't hesitate to reach out.
Best regards,
The {{orgName}} Team
B. Crawling Success Message#
Purpose: Notifies users when a website data source has been successfully crawled.
Required Variables:
Example Email Content:
Hello,
Great news! We've successfully crawled your website: {{seed_url}}.
Your data has been processed and is now ready to be used for training your chatbot. You can view the results and begin training by visiting your dashboard:
{{dashboard_url}}
If you encounter any issues or have questions about the next steps, our support team is here to help.
Best regards,
The {{orgName}} Team
C. Password Reset Notification#
Purpose: Sends a new temporary password or reset instructions to users.
Required Variables:
Example Email Content:
Hello,
Your password has been successfully reset. You can now log in to your account using the credentials below:
Email: {{email}}
New Temporary Password: {{password}}For your security, we strongly recommend changing this temporary password immediately after logging in. If you did not request this password reset, please contact our support team right away.
Best regards,
The {{orgName}} Team
D. Account Deletion Verification#
Purpose: Sends a verification code to confirm account deletion.
Required Variables:
Example Email Content:
Hello {{username}},
We've received a request to delete your account. To confirm this action and proceed with the account deletion, please use the verification code below:
Verification Code: {{code}}
Please note that account deletion is permanent and cannot be undone. All your data will be removed from our systems.
If you did not request this account deletion, please disregard this email and contact our support team immediately to secure your account.
Best regards,
The {{orgName}} Team
4. Enter Template IDs and Save#
After creating all four templates in SendGrid:
- Copy each Template ID from SendGrid
- Paste them into the corresponding fields in the Thinkstack Partner Portal.
- Click Save to apply your SMTP integration settings
Pro Tip
Now that SMTP is set up, remember to check the ✅ Send password in email option whenever you create a new customer account. This ensures the new user will automatically receive their login credentials via email.
That's a wrap! 🎉 You have successfully configured SMTP integration via SendGrid. All automated emails sent to your customers will now be delivered from your own email address, maintaining your brand's identity in every communication.